Snorby
Introduction
Description
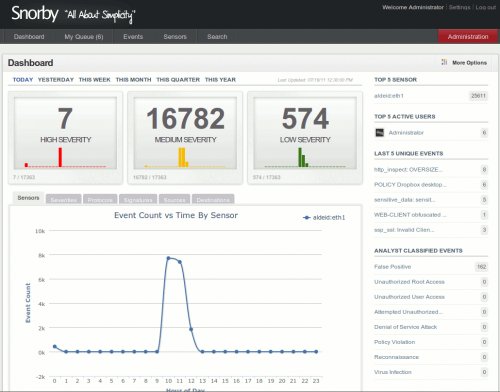
Snorby is a Ruby on Rails based frontend for Snort, Suricata and Sagan. Some of the features:
- Dashboard with Reporting:
- Number of events by severity (high, medium, low)
- event count vs time by sensor
- severity count vs time
- protocol count vs time
- signature distribution graph
- source distribution graph
- destination distribution graph
- My queue: enables to dispatch events for further investigation
- Events: timeline of events with details, including OpenFPC features
- Sensors: list of sensors
- Search: enables to filter events by criteria
- Administration: admin backend of the application
There are two ways to install Snorby:
- Using Insta-Snorby a prepared virtual machine featuring Snorby 2.2.6, Snort, Barnyard, OpenFPC, and Pulled Pork that is configured and ready to use.
- Install Snorby from sources.
This tutorial explains how to install Snorby 2.2.7 from sources on a Debian Squeeze (6.0) box.
Architecture
Snorby can be considered as a centralized console, gathering logs from remote IDS/IPS appliances (Snort, Suricata, Sagan).
However, in this tutorial, we will install Snort and Snorby on the same box, as follows:
You should have a valid installation of Snort (not explained in this tutorial). Please refer to this page for installing Snort.
Prerequisites
The very first thing is to install all necessary dependencies.
Packages
Ensure your system is updated:
# aptitude update && aptitude upgrade
Install some prerequisites available from the packages:
# aptitude install \
  gcc g++ build-essential libssl-dev libreadline5-dev \
  zlib1g-dev linux-headers-generic libsqlite3-dev libxslt1-dev \
  libxml2-dev imagemagick libmysqlclient-dev libmagickwand-dev \
  git-core mysql-server wkhtmltopdf default-jre
Ruby and Rails
Download and install Ruby (1.9.2):
# cd /usr/local/src/
# wget http://ftp.ruby-lang.org/pub/ruby/1.9/ruby-1.9.2-p180.tar.gz
# tar xvzf ruby-1.9.2-p180.tar.gz
# cd ruby-1.9.2-p180/
# ./configure
# make
# make install
Install dependencies (including Rails) with gem:
# gem install thor i18n bundler tzinfo builder memcache-client \
  rack rack-test erubis mail text-format sqlite3
# gem install rack-mount --version=0.4.0
# gem install rails
# gem install rake
OpenFPC
If you want to be able to use the packet capture options, you will also have to install and configure OpenFPC.
Install Snorby
Installation of Snorby
At this stage, all dependencies should be satisfied and we should be able to install Snorby. We will be installing Snorby in /var/www/ but you can also choose a different location, including the use of virtual hosts.
Go to /var/www/ and download Snorby:
# cd /var/www/
# git clone http://github.com/Snorby/snorby.git
Then edit database information:
# vim snorby/config/database.yml
And change the password to access your mysql server:
snorby: &snorby
  adapter: mysql
  username: root
  password: s3cr3tsauce
  host: localhost
Also edit the snorby configuration file:
# vim /var/www/snorby/config/snorby_config.yml
And paste these lines:
development:
  domain: localhost:3000
  wkhtmltopdf: /usr/bin/wkhtmltopdf

test:
  domain: localhost:3000
  wkhtmltopdf: /usr/bin/wkhtmltopdf

production:
  domain: localhost:3000
  wkhtmltopdf: /usr/bin/wkhtmltopdf
Install all required dependencies as specified in Gemfile:
# cd /var/www/snorby/
# bundle install
Then install Snorby by issuing:
# rake snorby:setup
Configuration of a sensor
Snorby gathers events from sensors. On our local server, we will configure Barnyard2 to write Snort events to the Snorby database.
Edit the barnyard2 configuration file:
# vim /usr/local/etc/snort/barnyard2.conf
And point to the snorby database:
output database: alert, mysql, user=<snorbyuser> password=<snorbypasswd> dbname=snorby host=localhost
Start Snorby
First start
In the next section, we will intall Passenger to be able to access our application with Apache2. But we want to ensure that our installation is successful.
Start Snorby with following commands:
# cd /var/www/snorby/
# rails server -e production
Now point your browser to:
http://<snorby_server>:3000
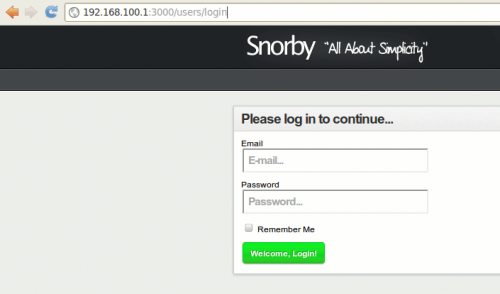
It redirects to http://<server>:3000/users/login. You should get this:
Login with:
- login: [email protected]
- password: snorby
If this works, we can install Passenger (go to the next section).
Recommended install of Passenger
Phusion Passenger simplifies the installation of Ruby on Rails application with Apache2 and Nginx.
First install following dependencies:
# apt-get install apache2-prefork-dev libcurl4-openssl-dev

Then install Passenger with gem:
# gem install passenger
# passenger-install-apache2-module
Edit your Apache configuration file:
# vim /etc/apache2/apache2.conf
And add these lines at the end of the file:
LoadModule passenger_module /usr/local/lib/ruby/gems/1.9.1/gems/passenger-3.0.7/ext/apache2/mod_passenger.so
PassengerRoot /usr/local/lib/ruby/gems/1.9.1/gems/passenger-3.0.7
PassengerRuby /usr/local/bin/ruby
Also edit your (external) virtual host file:
# vim /etc/apache2/sites-available/default
And modify it as follows:
<VirtualHost *:80>
  ServerName aldeid.local
  DocumentRoot /var/www/snorby/public
  <Directory /var/www/snorby/public>
    Options -MultiViews
    AllowOverride all
  </Directory>
  ...
</VirtualHost>
Once done, apply changes by restarting Apache:
# /etc/init.d/apache2 restart
Check sensor
From the menu, click on sensors and check that you have a sensor installed:
If needed, you can rename your sensor by clicking on its name.
Start worker and job queue
To be able to process events and display the dashboard, Snorby is based on a worker and a job queue.
They can either be started from the administration menu:
Or from command line:
# cd /var/www/snorby/
# ruby script/delayed_job start
# rails runner 'Snorby::Jobs::SensorCacheJob.new(false).perform; Snorby::Jobs::DailyCacheJob.new(false).perform'
Configure OpenFPC
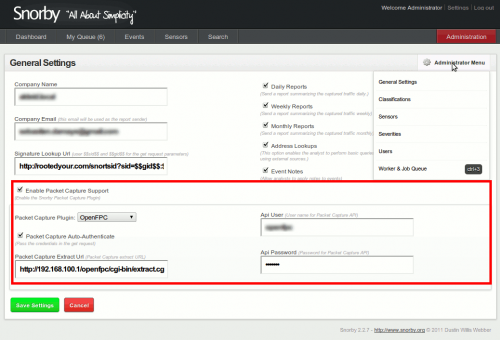
If you want to be able to use the packet capture options, from the Administration menu, go to "General Settings", check the box "Enable Packet Capture Support" and configure as follows:
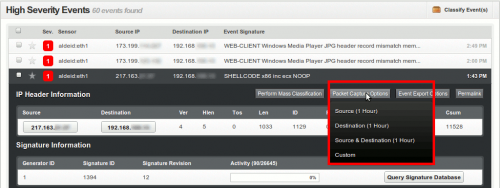
Once OpenFPC is properly configured, you have a new menu in the events:


