Armitage

Description
Armitage is a graphical frontend for Metasploit that shows targets and recommends exploits. Armitage aims at simplifying the usage of Metasploit.
Installation
Prerequisites
To be able to use Armitage, following prerequisites must be installed:
- Java 1.6+: sudo apt-get install sun-java6-plugin
- Metasploit 3.5+
- MySQL
To be able to use a MySQL database, you will also need the Ruby MySQL drivers:
$ sudo apt-get install libdbd-mysql-ruby1.8 libmysql-ruby1.8
Installation of Armitage
$ cd /data/src/
$ wget http://www.fastandeasyhacking.com/download/armitage011311.tgz
$ tar xf armitage011311.tgz
$ mkdir -p /pentest/exploits/
$ mv armitage/ /pentest/exploits/
Creation of a MySQL database
We must now create a MySQL database.
$ mysql -u root -p
mysql> CREATE USER msf3@localhost IDENTIFIED BY 'test';
mysql> CREATE DATABASE msf3;
mysql> GRANT ALL PRIVILEGES ON msf3.* TO msf3@localhost;
Usage
Start Metasploit RPC daemon
To start Metasploit RPC daemon, issue following commands:
$ cd /pentest/exploits/framework3/
$ ./msfrpcd -f -U msf3 -P msf3password -t Basic
Msfrpcd options are:
- -a <ip>
- Bind to given IP address
- Default: 0.0.0.0
- -p <port>
- Bind to given port
- Default: 55553
- -U <user>
- Specify the username to access msfrpcd
- -P <password>
- Specify the password to access msfrpcd
- -t <type>
- Server type (Basic|Web)
- -u <url>
- URI for Web server
- -S
- Disable SSL on the XMLRPC socket
- Default: false
- -f
- Run the daemon in the foreground
- Default: false
- -h
- Help banner
Connect to Metasploit with Armitage
Start Armitage:
$ cd /pentest/exploits/armitage/
$ ./armitage.sh
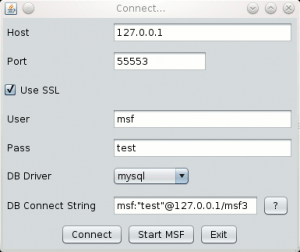
Then fill in the screen as follows:
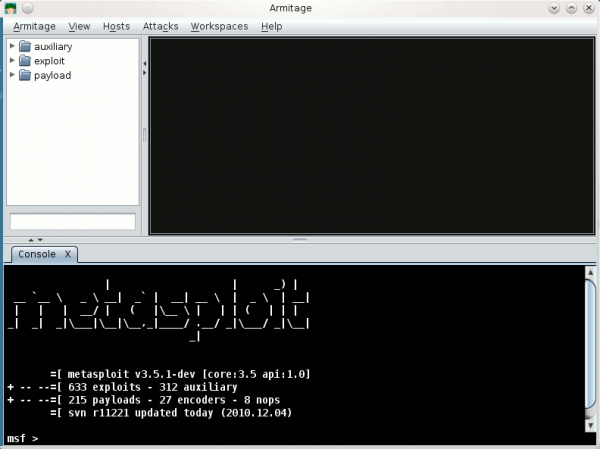
By clicking on "Connect", you should be able to get Armitage welcome screen:
Example
Description
Following example shows how to exploit a MS022-067 vulnerability against a WINXP box with Armitage.
The complete tutorial is available on Youtube: http://www.youtube.com/watch?v=yVeK0K6gnMk.
Start Metasploit MSFRPCD daemon and Armitage
In a first terminal, open a msfrpcd daemon to enable Armitage to communicate with Metasploit:
$ cd /pentest/exploits/framework3/
$ ./msfrpcd -f -U msf -P test -t Basic
In a second terminal, start Armitage:
$ cd /pentest/exploits/armitage/
$ ./armitage
Fill in the connection string and click on "Connect".
Scan the network (smb)
This step enables to discover *vulnerable* hosts on a network.
From the left panel (in Armitage), select auxiliary/scanner/smb/smb_version.
Fill in the required information as follows:
- RHOSTS: Modify this value to fit with the network to scan
- SMBDomain: Default value: WORKGROUP. Modify if you are on a different domain or workgroup.
- SMBPass: if known. Else, leave blank.
- SMBUser: if known. Else, leave blank.
- THREADS: Default value: 24. Increase/decrease depending on the quality of the network.
Click on "Launch" to start the discovery. Discovered hosts are automatically added to the central panel.
Find attacks
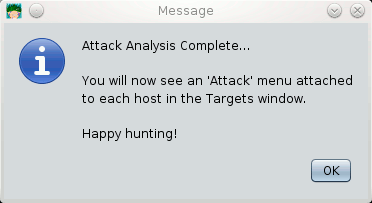
Once you have discovered a potential vulnerable host, from Armitage menu, click on Attacks/Find Attacks/by port. Wait for a while, you should then be alerted by such a popup:
Exploit vulnerability
Once the assessment is complete, a new contextual menu (Attack) should be available (right click on the host) for vulnerable hosts. From this menu, select Attack/smb/ms08_067_netapi.
Fill in the information as follows:
- LHOST: Local host. Set with your local IP address
- LPORT: Local port. Leave default value unless you need to change it.
- RHOST: Target host IP address
- RPORT: Port to use for the attack. Leave 445.
- SMBPIPE: Leave default value (BROWSER)
- Targets: Eventually use this dropdown list to specify the host but automatic targeting should be fine.
Click on "Launch".
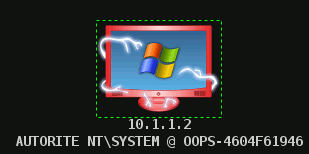
If the attack succeeds, vulnerable hosts should become red, surounded with thunders.
From contextual menu (right click on the host), select Meterpreter 1/Interact/Meterpreter shell. You have a shell on the machine!
Comments
Keywords: armitage redteam exploitation cobaltstrike cobalt strike


